前回は、Firebase Authentication の機能を使って、FIrestore Database からデータを取得し、ブラウザに表示させました。

【Firebase】FIrestore Databaseから取得したデータを、ブラウザに表示させる
今回は、Firestore Database を使い、React でメッセージ送信機能を実装します。
まずは、メッセージを送信するコンポーネントを作成します。
components フォルダに MessageInput.tsx を作成します。
MUI のBox、Button、Divider、Stack、TextFieldを使い、画面を作成します。
また、アイコンは、MUI のSendIconを使用します。
tsx
return (
<Box
sx={{
position: "fixed",
bottom: 0,
width: "100%",
}}
>
<Divider />
<Stack direction="row" spacing={2} sx={{ margin: "0.5rem 1rem" }}>
<TextField size="small" sx={{ flex: 1 }} />
<Button variant="contained" endIcon={<SendIcon />}>
送信
</Button>
</Stack>
</Box>
);
Home.tsx で MessageInput.tsx をインポートします。
tsx
return (
<Box sx={{ flexGrow: 1 }}>
<Header />
{messages ? (
messages.map((message: Message) => (
<div key={message.id}>
<p>{message.text}</p>
<p>{format(message.createdAt.toDate(), "yyyy年MM月dd日")}</p>
</div>
))
) : (
<p>メッセージが存在しません</p>
)}
<MessageInput />
</Box>
);
ブラウザで確認すると、

入力欄と送信ボタンが表示されました。
MessageInput.tsx へ戻り、テキストの状態管理を設定します。
tsx
const [message, setMessage] = useState("");
tsx
<TextField
size="small"
sx={{ flex: 1 }}
onChange={(e) => setMessage(e.target.value)}
/>
送信ボタンをクリックした時に、handleClick関数が動作するようにします。
tsx
<Button
variant="contained"
endIcon={<SendIcon />}
onClick={() => handleClick()}
>
送信
</Button>
tsx
const handleClick = async () => {};
handleClick関数内に、Firebase の処理を実装します。
以前 Firebase の初期設定した、Firebase フォルダの firebaseConfig からfirebaseAppをインポートします。
Firebase の設定は、こちらをご覧ください。

【Firebase】Firebase Project Configを設定する

【Firebase】Firestore Databeseのデータを、フロントエンドに表示する
tsx
const handleClick = async () => {
const firestore = firebaseApp.firestore;
};
try/catch を使い、成功した場合にはデータを送信し、失敗した場合にはエラーを表示するようにします。
エラー処理として、エラーを状態管理し、MUI のAlertを設定しましょう。
tsx
const [error, setError] = useState(false);
tsx
{
error && <Alert severity="error">送信できませんでした</Alert>;
}
エラーの場合は、setErrorがtrueになるようにします。
tsx
const handleClick = async () => {
setError(false);
const firestore = firebaseApp.firestore;
try {
} catch (err) {
console.log(err);
setError(true);
}
};
try の中を設定します。
Firebase Database のどのコレクションに書き込むかを設定するために、firebase/firestoreからcollectionをインポートします。
tsx
import { collection } from "firebase/firestore";
collection の第一引数に先程設定した firestore、第二引数にコレクション名である『messages』を指定します。
tsx
try {
const docRef = collection(firestore, "messages");
} catch (err) {
console.log(err);
setError(true);
}
Firebase へデータを送信するために、firebase/firestoreからaddDocをインポートします。
tsx
import { addDoc, collection } from "firebase/firestore";
addDoc の第一引数に先程設定したdocRef、第二引数に送信したい内容を設定します。
送信したい内容は、textとcreatedAtにしましょう。
textは、messageを指定します。
createdAt は、Firebase の Timestamp を使用したいので、firebase/firestoreからTimestampをインポートします。
tsx
import { addDoc, collection, Timestamp } from "firebase/firestore";
TimestampのfromDateを使用して、Firebase の Timestamp を設定します。
tsx
try {
const docRef = collection(firestore, "messages");
await addDoc(docRef, {
text: message,
createdAt: Timestamp.fromDate(new Date()),
});
} catch (err) {
console.log(err);
setError(true);
}
一通り完成したので、動作確認します。
メッセージを入力してみます。

送信ボタンをクリックすると、

メッセージが追加されました。
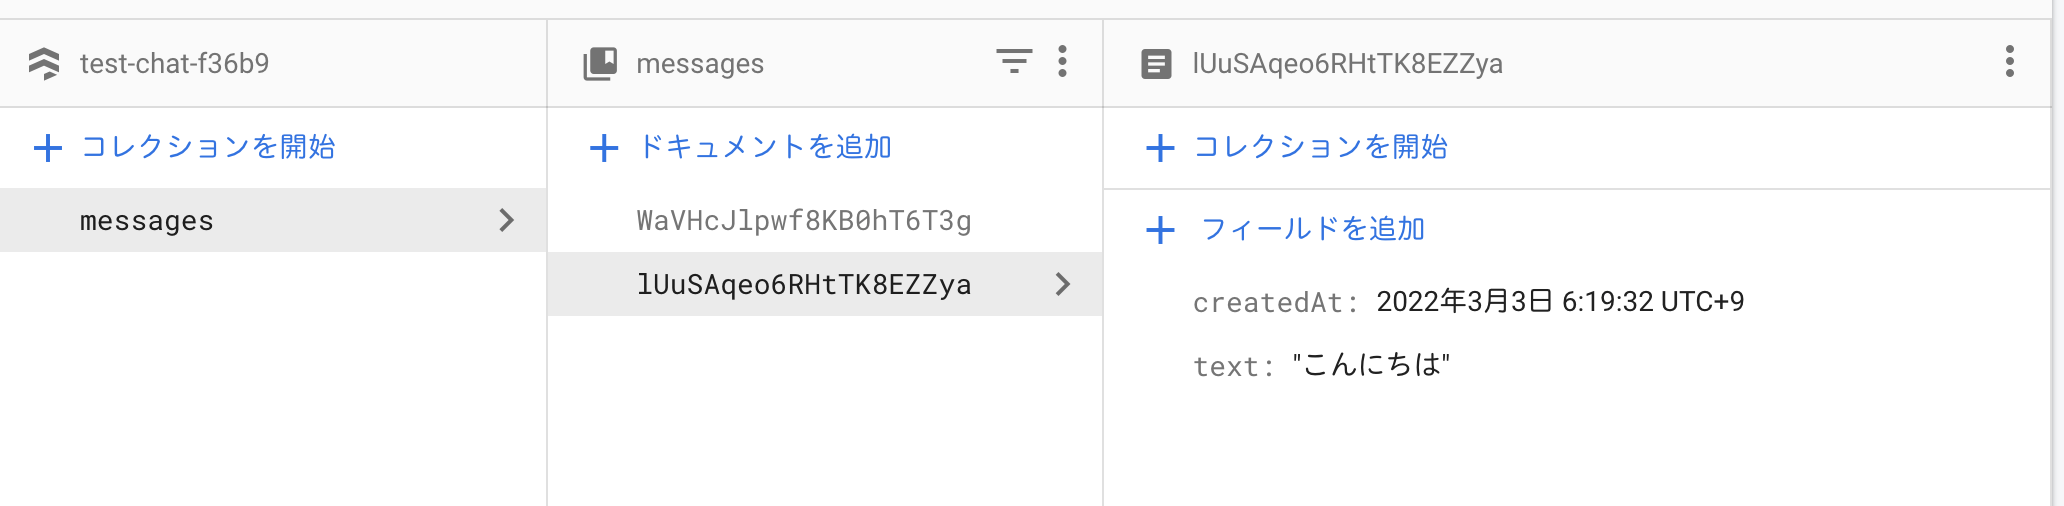
Firebase Database を確認すると、データが追加されていました。
このままでは、空文字を送信しても、送信されてしまいます。
空文字を送信できないように、try の前に条件文を追加します。
messege がからの場合は、エラーを表示するようにして return しましょう。
tsx
const handleClick = async () => {
setError(false);
const firestore = firebaseApp.firestore;
if (message === "") {
setError(true);
return;
}
try {
const docRef = collection(firestore, "messages");
await addDoc(docRef, {
text: message,
createdAt: Timestamp.fromDate(new Date()),
});
} catch (err) {
console.log(err);
setError(true);
}
};
空文字を送信してみると、

送信できず、エラーメッセージが表示されました。
次回は、プロフィール編集画面を作成し、Firestore Storage にアバター画像を保存します。
【Firebase】プロフィール編集画面を作成し、Firestore Storageにアバター画像を保存する