
Flutter
【Flutter】Navigatorを使い、遷移元のデータを遷移先へ受け渡す
作成日:2022年03月14日
更新日:2022年03月14日
今回は、Flutter で遷移元のデータを遷移先へ受け渡します。
遷移元は MyHomePage。遷移先は MySecondPage とします。
dart
import 'package:flutter/material.dart';
void main() {
runApp(const MyApp());
}
class MyApp extends StatelessWidget {
const MyApp({Key? key}) : super(key: key);
Widget build(BuildContext context) {
return MaterialApp(
title: 'Page Route',
theme: ThemeData(
primarySwatch: Colors.blue,
),
home: const MyHomePage(),
);
}
}
class MyHomePage extends StatelessWidget {
const MyHomePage({Key? key}) : super(key: key);
Widget build(BuildContext context) {
return Scaffold(
appBar: AppBar(
title: const Text("First Page"),
),
body: Center(
child: ElevatedButton(
onPressed: () {},
child: const Text("to Second Page"),
),
),
);
}
}
class MySecondPage extends StatelessWidget {
const MySecondPage({Key? key}) : super(key: key);
Widget build(BuildContext context) {
return Scaffold(
appBar: AppBar(
title: const Text("Second Page"),
),
body: Container(
color: Colors.lightGreenAccent,
child: const Center(
child: Text("This is Second Page!"),
),
),
);
}
}
まずは、MyApp クラスのMaterialApp内で、MyHomePage と MySecondPage のルートを設定します。
dart
Widget build(BuildContext context) {
return MaterialApp(
title: 'Page Route',
theme: ThemeData(
primarySwatch: Colors.blue,
),
routes: {
"/home": (context) => const MyHomePage(),
"/second": (context) => const MySecondPage(),
},
home: const MyHomePage(),
);
}
次に、MyHomePage クラス内のElevatedButton内のonPressedにNavigatorを設定します。
NavigatorにはpushNamedを設定しましょう。
pushNamed の第一引数は context、第二引数は遷移先のルート、第三引数には引渡したいデータを設定します。
dart
body: Center(
child: ElevatedButton(
onPressed: () {
Navigator.pushNamed(context, "/second", arguments: "That's fun!");
},
child: const Text("to Second Page"),
),
),
遷移先である MySecondPage で、先程設定したargumentsを受け取ります。
dart
class MySecondPage extends StatelessWidget {
const MySecondPage({Key? key}) : super(key: key);
Widget build(BuildContext context) {
final arg = ModalRoute.of(context)!.settings.arguments;
return Scaffold(
appBar: AppBar(
title: const Text("Second Page"),
),
body: Container(
color: Colors.lightGreenAccent,
child: Center(
child: Text("This is Second Page!"),
),
),
);
}
}
Scaffoldのbody内にある『This is Second Page!』をargへ変更しましょう。
argは、Stringを指定します。
dart
body: Container(
color: Colors.lightGreenAccent,
child: Center(
child: Text(arg as String),
),
),
では、動作確認します。
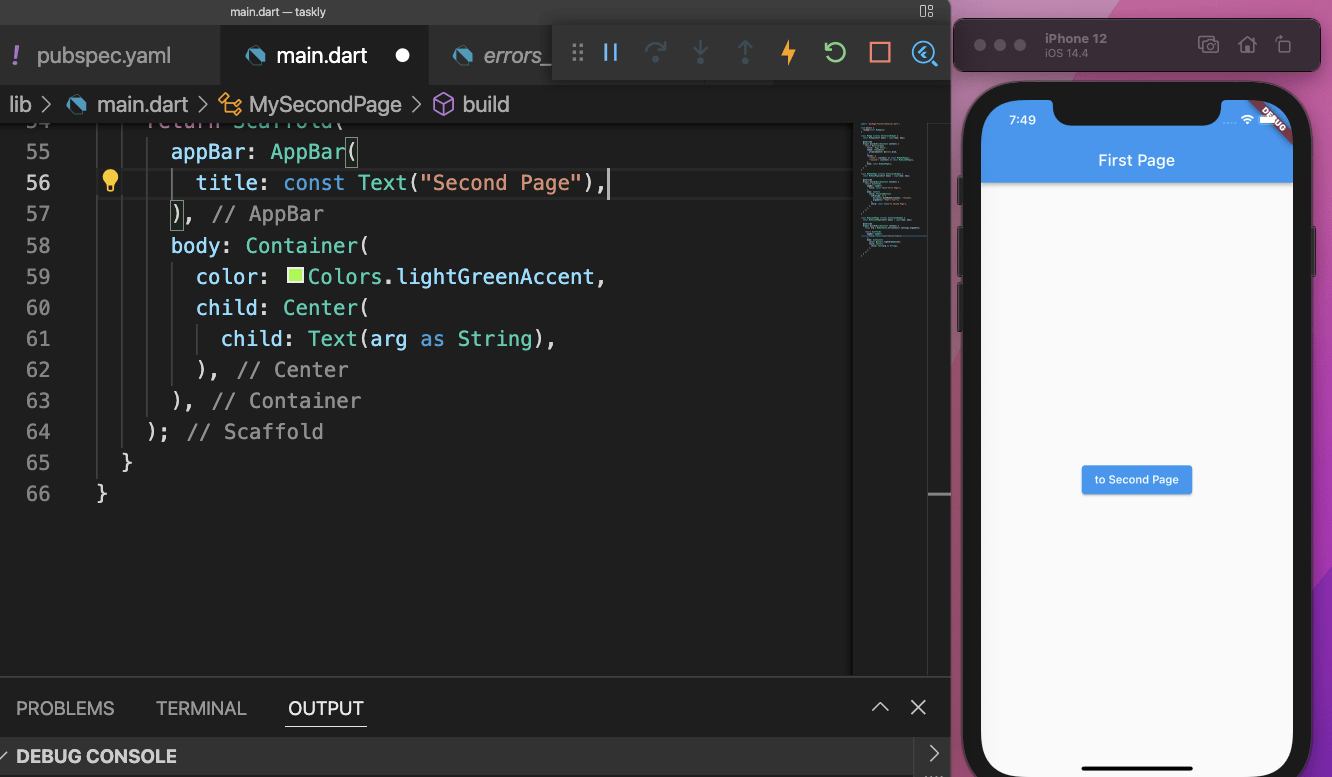
『to Second Page』ボタンをクリックすると、
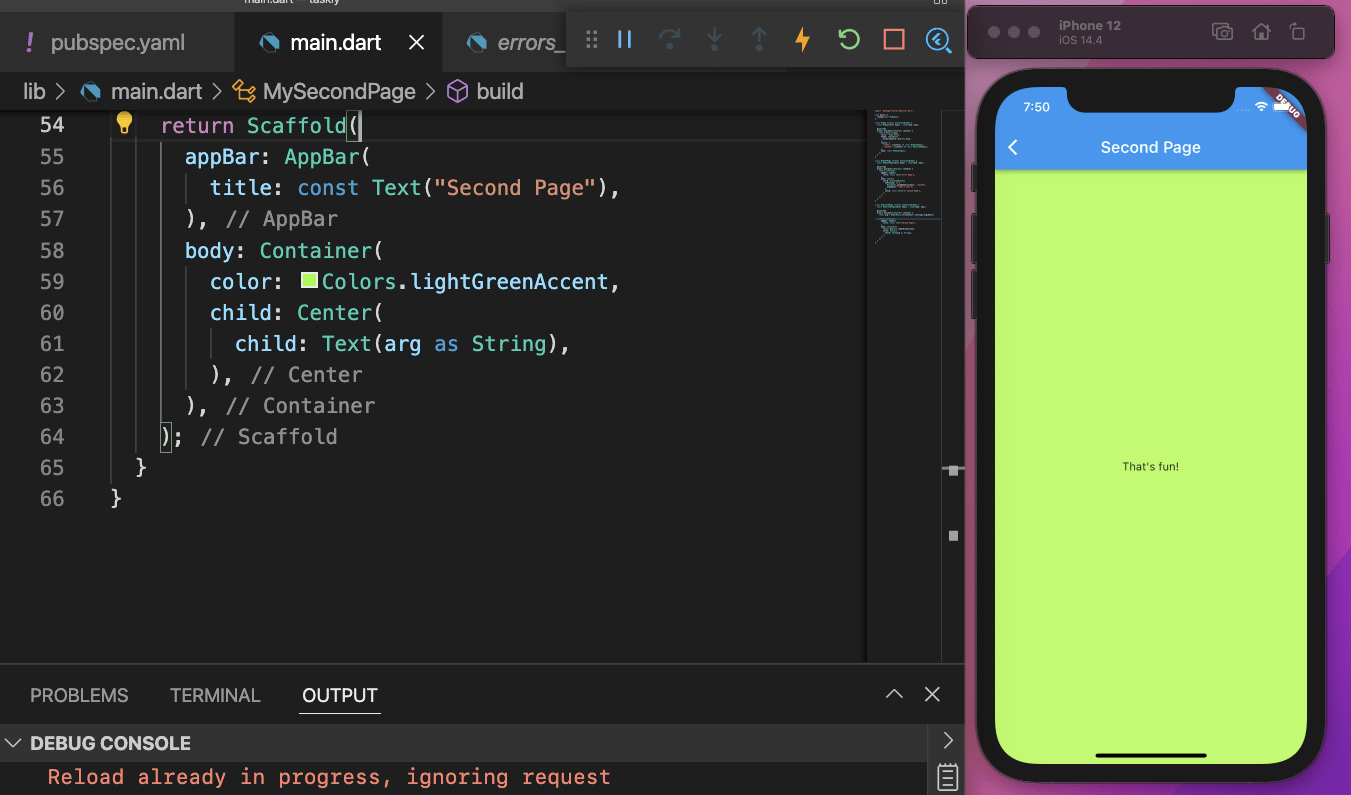
argumentsで指定した、『That’s fun!』が表示されました。
お知らせ
私事ですが、Udemyで初心者を対象にしたReactの動画コースを作成しました。
Reactについて興味がありましたら、ぜひ下のリンクからアクセスしてください。
詳しくはこちら(Udemyの外部サイトへ遷移します)
